


Welcome to Day 64 of the #100DaysOfDevOps Challenge! Today we will see How to Create AWS S3 Bucket
What is an Amazon S3 bucket?
Being an object storage service, Amazon S3 enables us to store our data in the form of objects. For storing our data, Amazon S3 provides us a storage resource, which is popularly known as S3 bucket. In fact, we can relate bucket with our daily life too. In our daily life, we use buckets for storing things or objects, most commonly water. In the similar way, Amazon S3 uses buckets for storing the objects uploaded by us. Hence, in short, Amazon S3 bucket can be defined as the fundamental storage resource or container for storing objects.
In this article, we are going to gain basic idea on Amazon S3 bucket. To be more elaborative, our goal is to gain hands-on experience on Amazon S3 by indulging ourselves in following activities in Amazon S3.
Without further delay, let’s get started.
How to create an Amazon S3 bucket?
Step 1
Sign in to the AWS Management Console using your credentials. Once you login successfully, you will be displayed the home page of AWS Management Console.
Step 2
Click on “Services” present in top-left corner of the Console Home.
You will be displayed a menu of services.
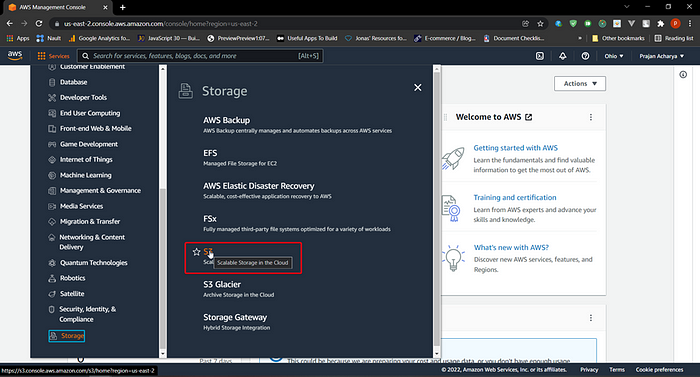
From the menu of services, find and click “Storage” menu.
You will be displayed a list of storage services provided by AWS, on the right hand side of menu of services.
Finally, from the list of storage services, click on “S3”.


Step 3
To create a bucket, search for a yellowish “Create Bucket” bucket in the right hand side of Console Home page and click on it. You will be displayed a wizard for creating bucket, which comprises of number of sections, where each section is intended to collect several information from us for creating a S3 bucket.


Step 4
Fill up the required information in all the sections of the wizard. Each section has been provided with the information explaining what it is and it’s purpose. Go through those information in case of any confusion and fill up all the sections carefully.
Before moving any further, lets have a clear picture on what are we supposed to do in each section of the wizard.
- In “General Configuration” section, enter the bucket name and select an AWS region where the bucket would be created and stored.
✓ While entering the name for the bucket, please make sure that the name entered by you satisfies all the Bucket naming rules. Also, after we create a bucket, we cannot change its name. Hence, it is good to have concise knowledge on Bucket naming rules before giving a name to a bucket.
For gaining information on naming bucket, please see Bucket naming rules.✓ While choosing an AWS Region, choose a region close to you or your target audience, for minimizing latency and costs and address regulatory requirements.
In “Object Ownership” section, you can either disable or enable ACLs and control ownership of the objects uploaded to the bucket. For that, you have to choose a setting from two provided settings i.e. choose either “ACLs disabled” setting or choose “ACLs enabled” setting. If you have any doubt on what each setting means, please go through the description provided under each setting.
In “Block Public Access settings for this bucket” section, choose the Block Public Access settings that you want to apply to the bucket. By default, all the four available setting are enabled and AWS recommends that you keep all those setting enables unless turning off one or more of them is required.
For more information on blocking public access, please see “Blocking public access to your Amazon S3 storage”.
In “Bucket Versioning” section, you can either enable or disable versioning for the bucket. By default, versioning is disabled. Enable it only if you require to keep multiple versions of an object in the same bucket.
In “Tags” section, you can add tags to your bucket for various purposes such as tracking storage costs, grouping resources and so on. This section is optional.
In “Default encryption” section, you can either enable or disable server-side encryption for the objects to be stored in the bucket. By default, it is disabled.
In “Advanced Setting” section, you can either enable or disable object lock property for the objects to be stored in the bucket. By default, it is disabled. Please read the information provided in this section and enable it if required.
Now that you have a clear idea on what are you supposed to do in each section, fill each of the section carefully reading the information provided, and finally, click “Create bucket” button to submit the wizard.

After clicking on “Create bucket” button, a bucket would be created and you will be displayed the home page of Amazon S3 with the newly created bucket listed under “Buckets” sections as shown in the screenshot below:

Congratulations! You have created a bucket in Amazon S3.
How to upload object(s) to Amazon S3 bucket
Amazon S3 bucket stores the data uploaded by us in the form of object. Hence, the object can be anything from document, image files, video files, folders and so on. In order to upload object(s) to Amazon S3 bucket, you carry out following steps:
Step 1
In the home page of Amazon S3, under Buckets section present in the middle of the page, you will be displayed a list of Amazon S3 buckets. You have to find and click on the bucket, inside which you want to upload object(s). After you click on the bucket, you will be displayed a page for the bucket you clicked. You can click on the bucket that you created just earlier i.e. “test-bucket-unique-name-1”


Step 2
Click on “Upload” button present in the right hand side of the screen. You will be displayed a page for uploading objects / files in the bucket.


Step 3
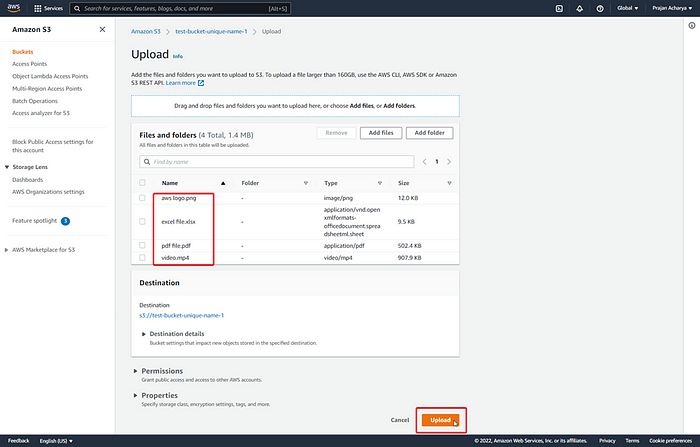
Click on the “Add files” button present under “Files and folders” section. You will be displayed a file explorer from where you can select file(s) and upload. Alternatively, you can drag and drop file(s) directly into the page for uploading.
After selecting and confirming the files to be uploaded via. File explorer or via. Drag and drop, the selected files would be displayed under “Files and Folders” section. Finally, after clicking “Upload” button present at the bottom of the page, the selected files would be uploaded to the particular Amazon S3 bucket and you will be then displayed a success message, summary of success message and the list of uploaded files under “Files and Folders” section.


Congratulations! Now you have successfully uploaded object(s) to Amazon S3 bucket.