Welcome to Day 48 of the #100DaysOfDevOps Challenge! Today, we are going to Create and Launch Windows Server on EC2 AWS
Steps To Create AWS Windows EC2 Instance
Note: If you don’t have an AWS account, check my Day 47th. blog on how to create an AWS Free Tier Account
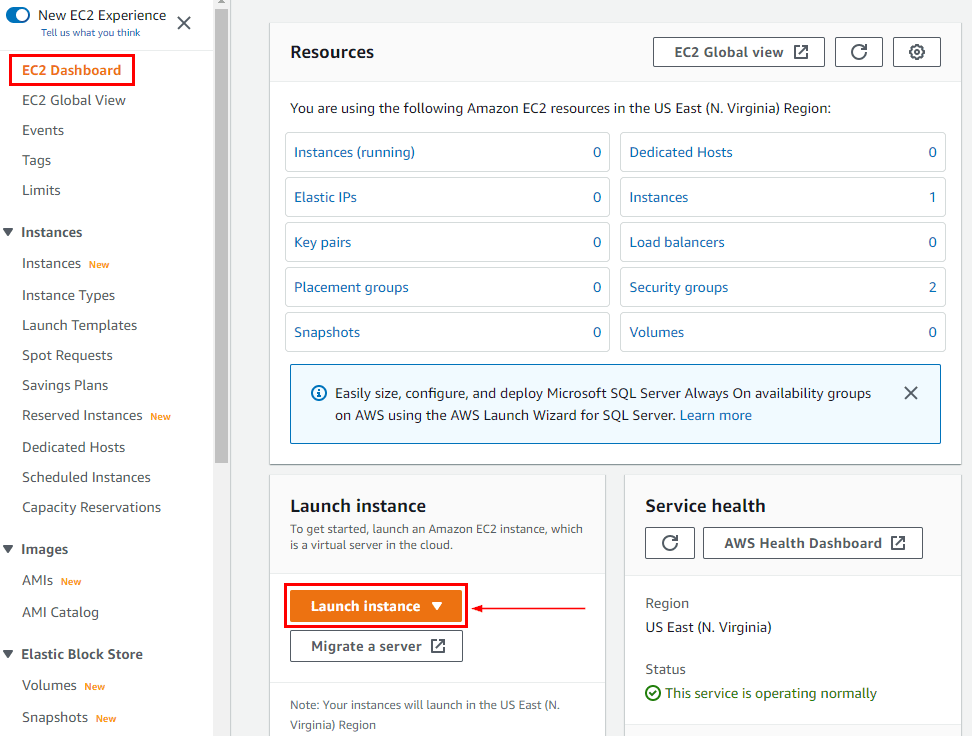
Step 1: Log in to your AWS account and go to the EC2 dashboard to launch a new instance.
Step 2: In the Name and Tags step, you can add tags to an instance. Here, tags help you to enable categorizing AWS resources in different ways, for example, by owner, environment, or purpose. For example, you could define a set of tags for your account’s EC2 instances that help you track each instance’s owner and stack level.

Step 3: Select Windows under QuickStart and Select Microsoft Windows Server 2022 Base AMI. You can also select other AMIs as per your needs, but here we are launching a Windows Server, so we have to select the Windows Server 2022 Base AMI.

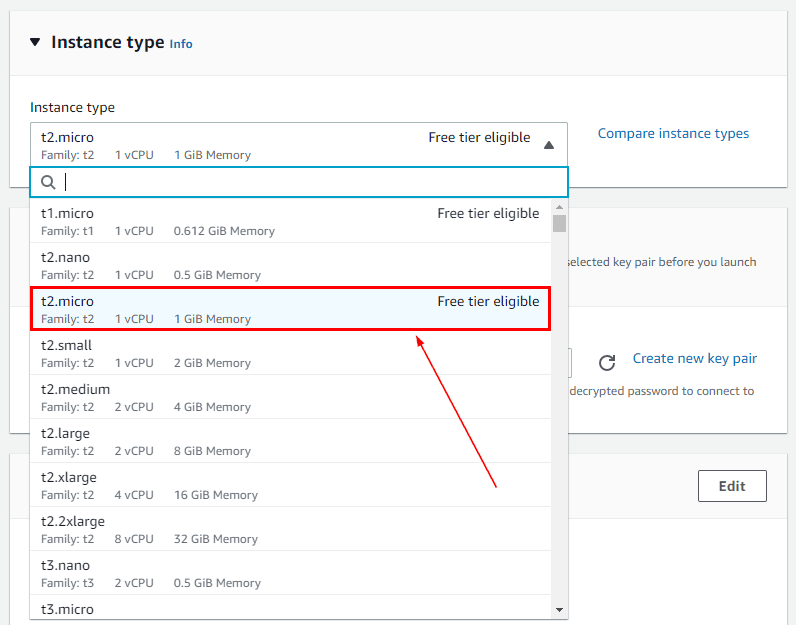
Step 4: Select the t2.micro instance type. If you want, you may select another instance type, but they are chargeable, so we choose the t2.micro instance type, which is eligible for the free tier and limited resources.
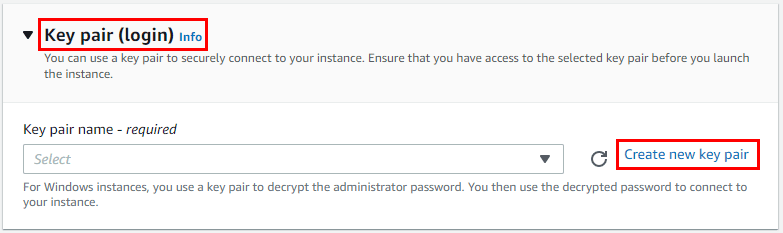
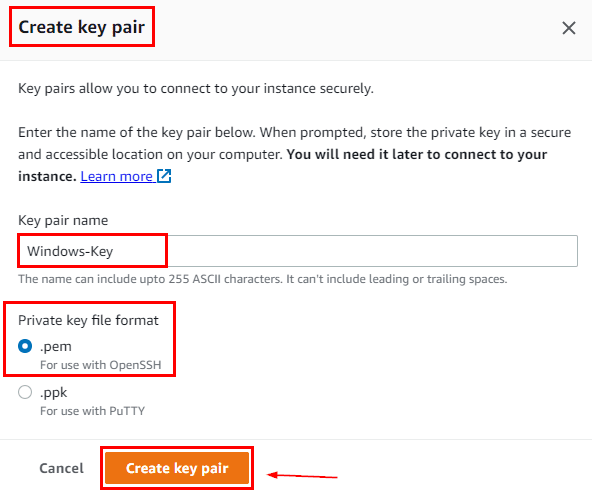
Step 4: Select an existing key pair or create a new one. We will create a new one, enter the name of the Key-pair as Windows-Key, and Create the Key Pair.
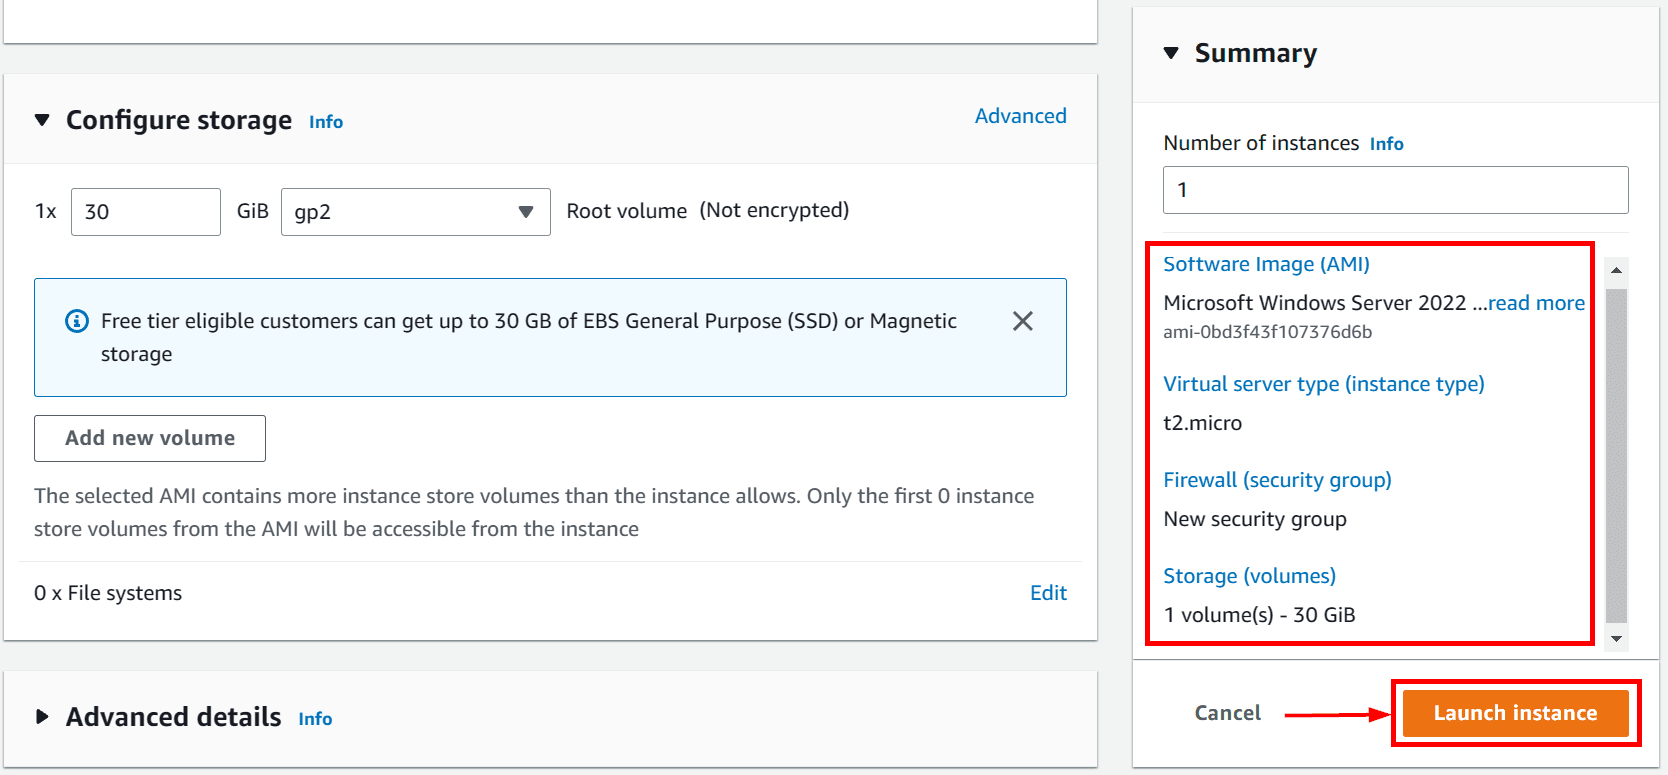
Step 5: Now, keep everything default and click on Launch Instance.
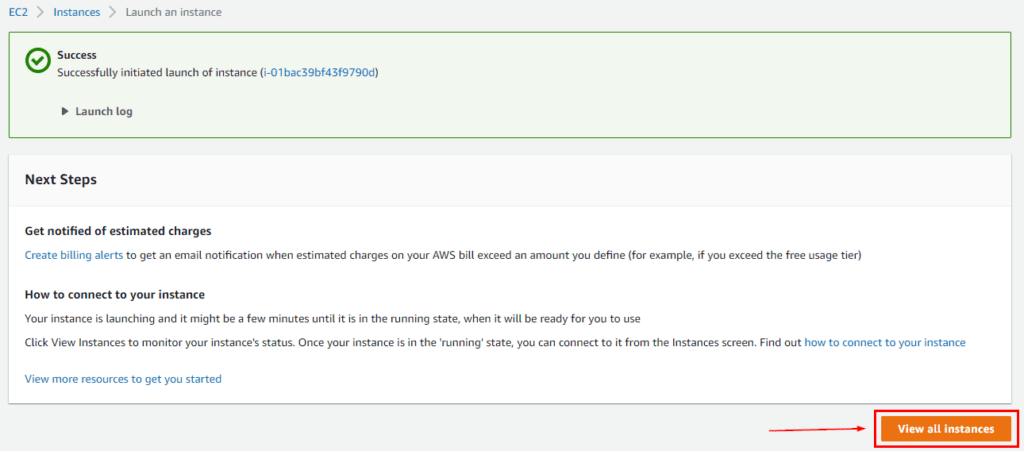
Step 6: Now Click on View all Instances.
Step 7: Here, you shall see your instance is launching and the Status check is Initializing, wait for some time.

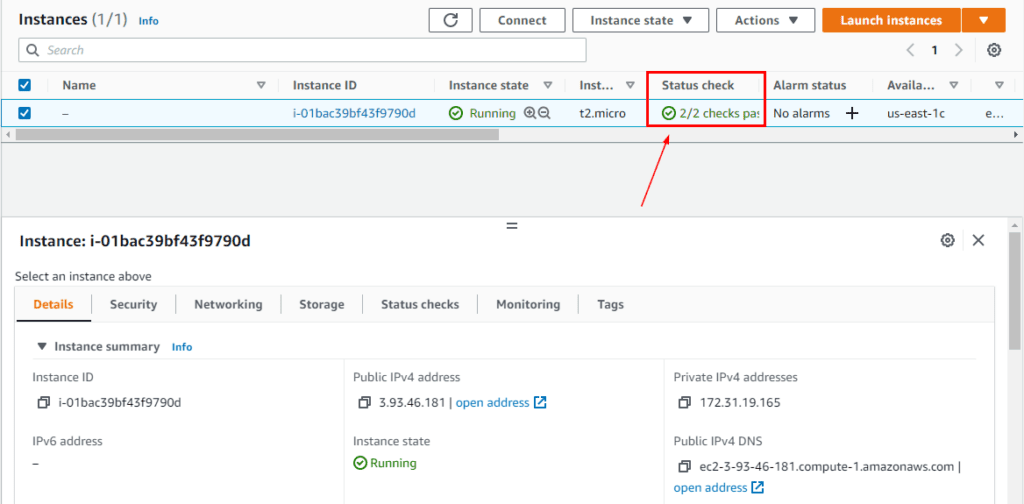
Step 8: Refresh, and you shall see your instance is Up and Running, and the Status check has changed to 2/2 checks.
Steps To Connect AWS Windows EC2 Instance
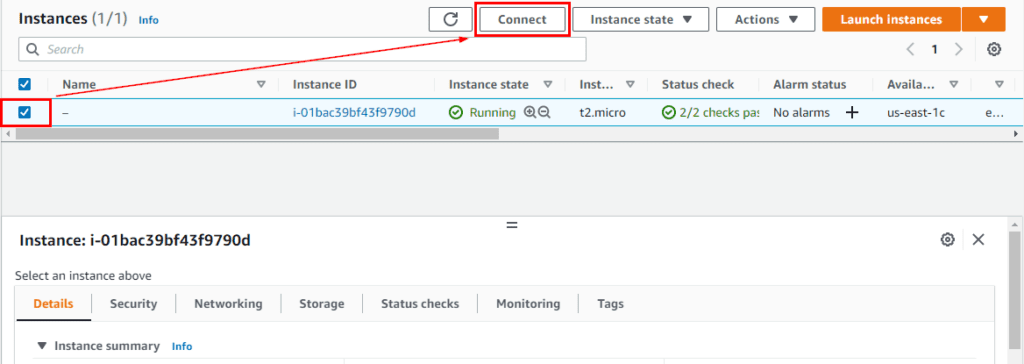
Step 1: First, we have to select the Windows instance From the Running Instance of the EC2 dashboard and click on Connect.
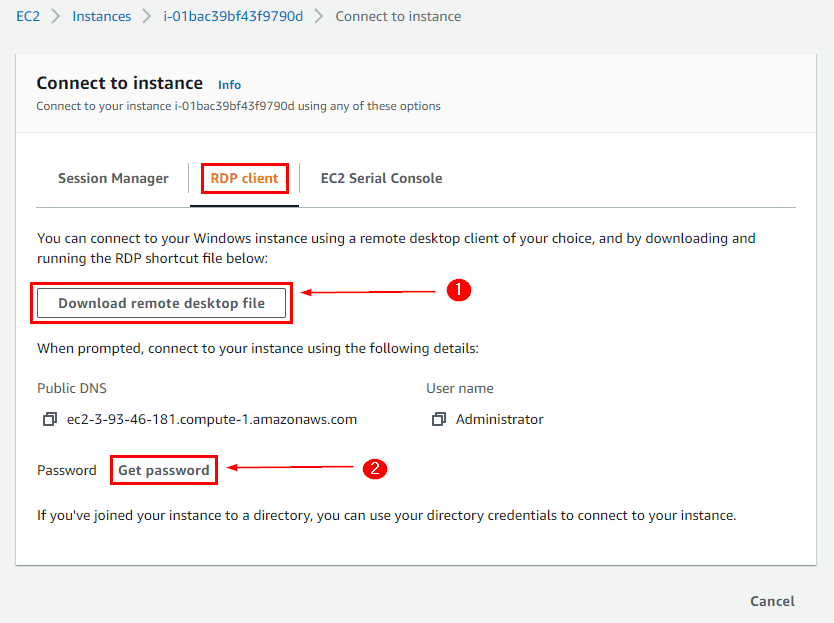
Step 2: Here we have to select the RDP (Remote desktop protocol) Client and then Download the RDP File and save it somewhere safe. We then need a password to access the RDP file, so click on Get Password.
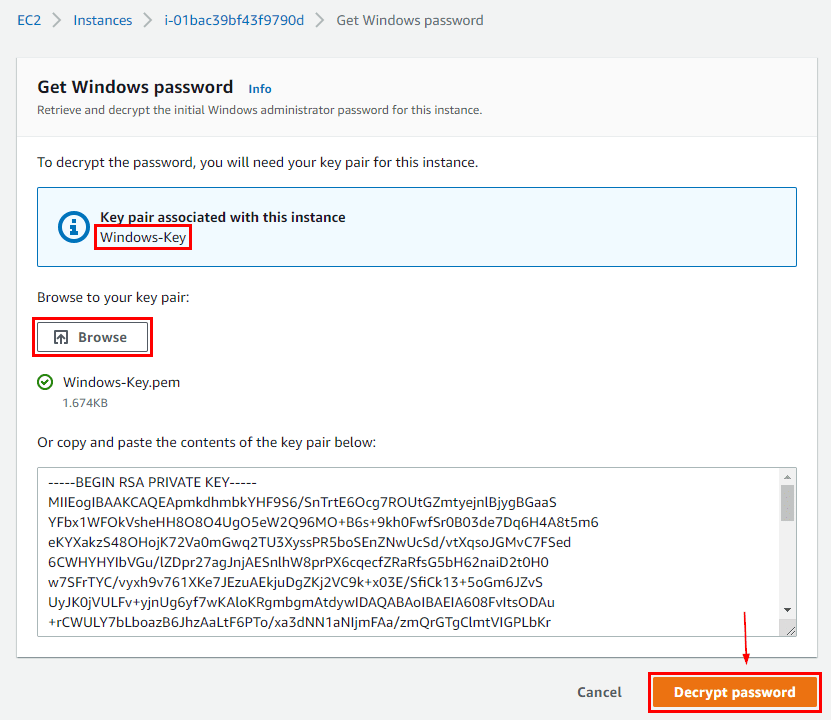
Step 3: At this step of launching, we have to upload the Key-pair (the key that we created in the earlier step). Click on Browse, then select the key and click on Decrypt Password. This provides us with a usable password.
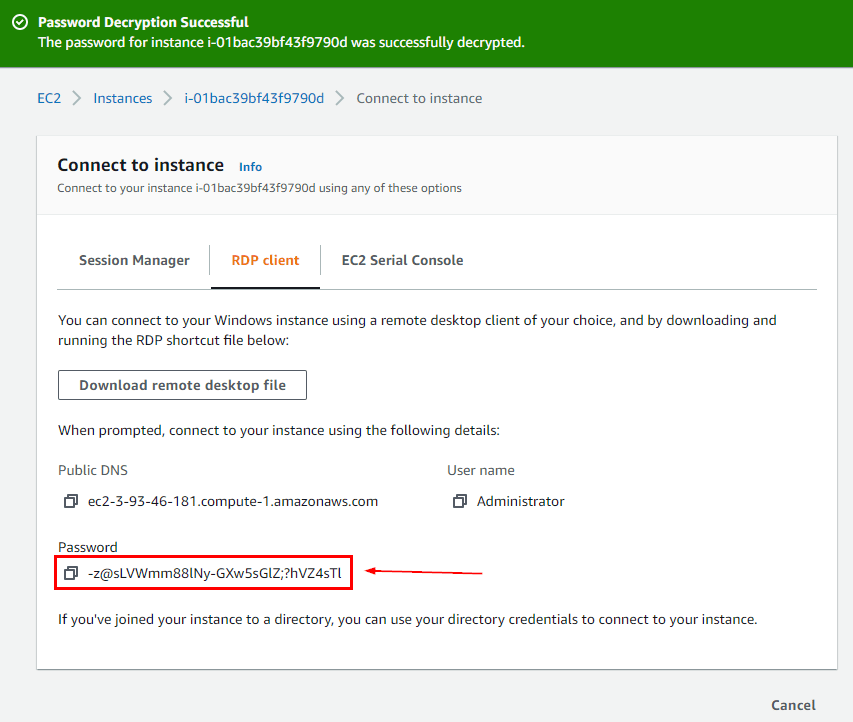
Step 4: After submitting the key pair, the Password is Generated, copied, and saved somewhere safe.
Step 5: Now open the Remote Desktop File from downloads for launching the Windows instance. If your local computer is a Mac, you will need to download “Microsoft Remote Desktop” from the App Store to be able to open your RDP file.

Step 6: After opening the RDP file, click on Connect to launch the Window instance.
Note: Windows has the Remote Desktop Connection Application pre-installed, so for other OSs like Mac you need to download the Microsoft Remote Desktop app from the Mac App Store.
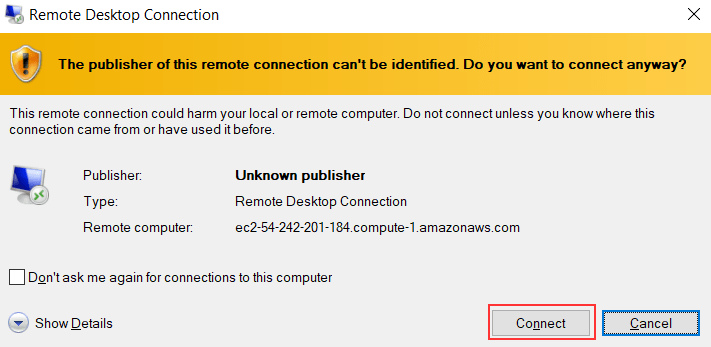
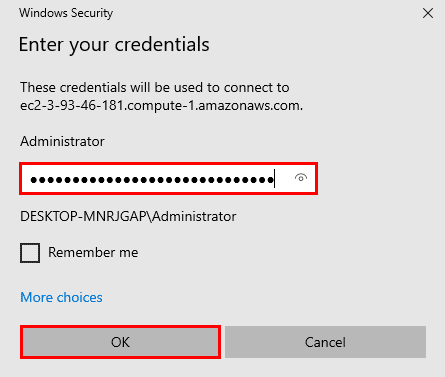
Step 7: Here we have to provide the credentials for accessing the Instance so we have to Enter the Password That we copied in Step 4 and click on OK.
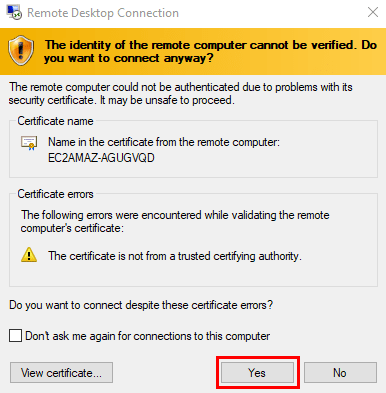
Step 9: Click on Yes.
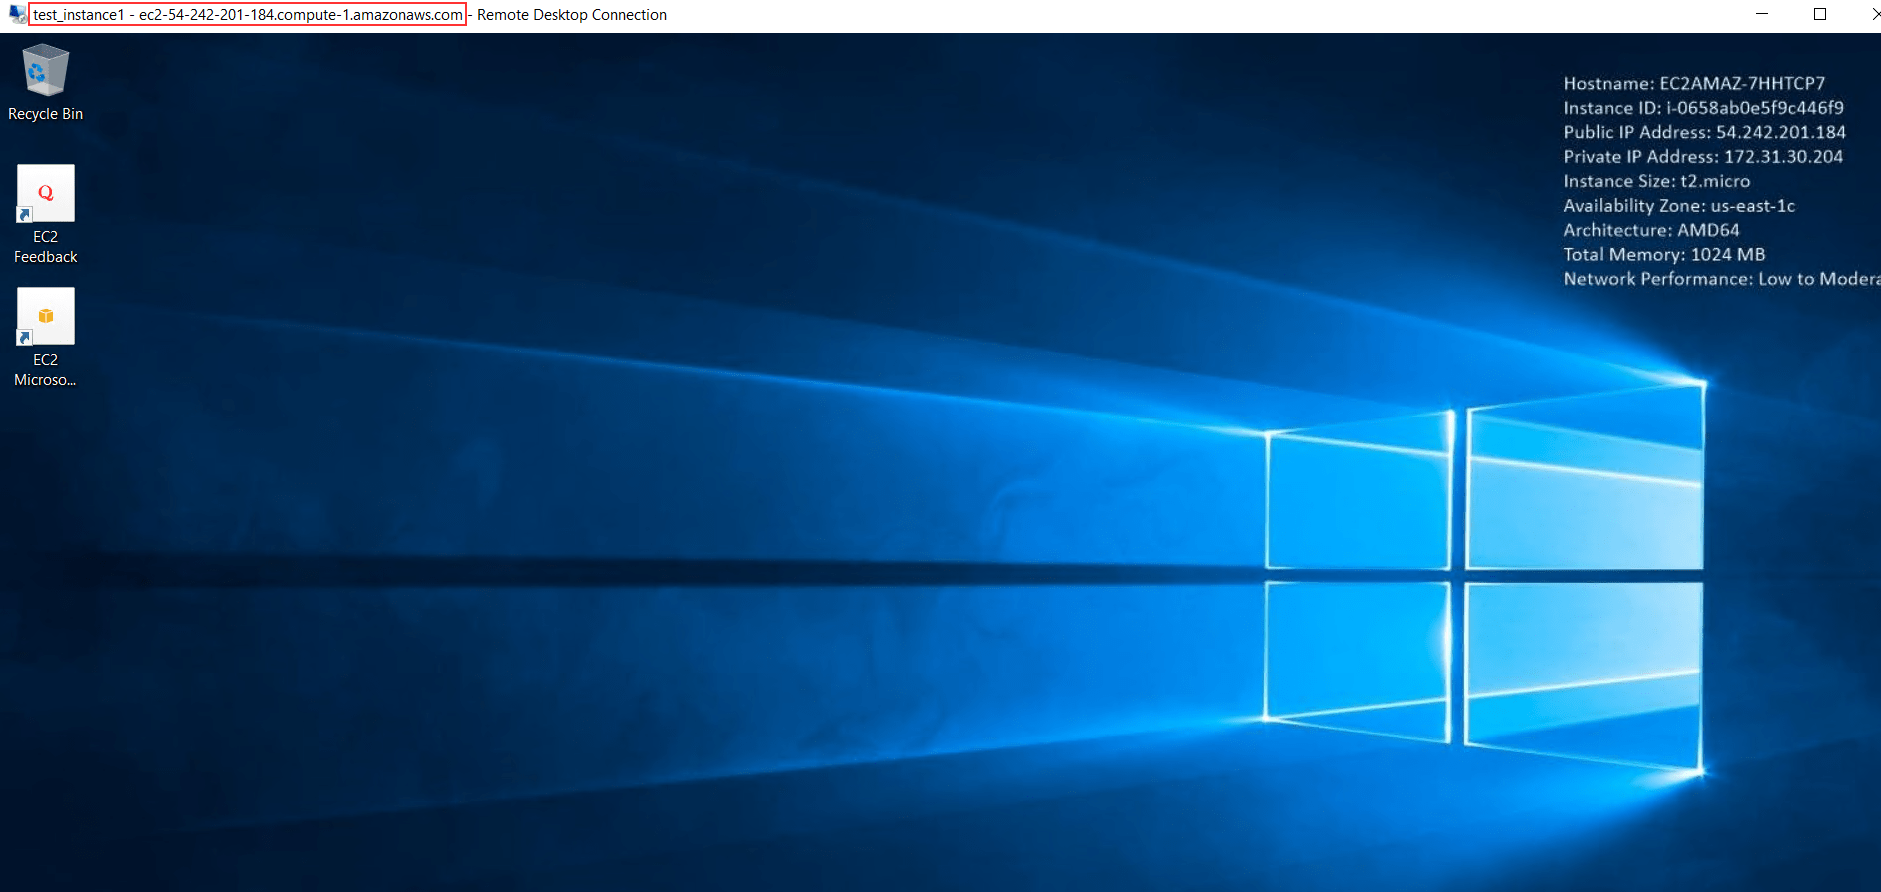
Step 10: So we have successfully connected to an AmazonWindows Instance, Here we perform all our operations and tasks that we are performing on the normal Windows operating system.